Pages

Antique Map Chest


A treasured piece of furniture in our home is a chest of drawers that belonged to my dear father-in-law. This sweet chest made a long road trip years ago with hubby and I to our home in Texas from dear father-in-law's home in Ontario, Canada.

We have the perfect place for it in our dining room and it is a convenient and wonderful place to store all of my table linens.  It's very dark and layered in decades of aged varnish.  After a few years of being in our home, I painted gold stripes on the drawers.

Here's the before:

Recently, I was ready for a change but didn't want to totally refinish it or change the dark exterior.  
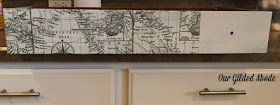
When I ran across these George Stanley map design paper beverage napkins at Home Goods, I knew they'd be perfect to give the chest a new look!

Supplies used:
~~ Beverage napkins
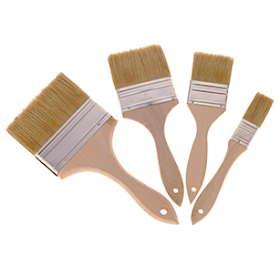
~~ 2" disposable bristle brush
~~ Dark paint (custom mix)
~~ Light paint (custom mix)


The napkins were 3-ply with the top design layer and two solid layers.  I separated the design layer from the other 2 layers for each napkin.  Only the design layer was used.

Then I painted over the gold stripes with dark paint to match (as closely as I could) the dark color of the chest.


Using Mod Podge thinned with a little water, I brushed the Mod Podge on the drawer front and applied the napkins.  This was tricky and on my first attempts, the napkins tore.  But, after using a piece of plastic wrap, it worked great.  I placed the plastic wrap over the napkin while the glue was still wet, and gently rubbed across the plastic wrap with my fingers and miraculously, the napkins didn't tear! 


At this point I was so hopeful this project may actually go as planned!  Silly me!  (Experienced decoupagers will know exactly where I went wrong.)

As the napkins dried, the light background design of the napkin didn't stay light colored - the dark drawer paint color showed thru and the napkin design was barely visible.  Miserable fail on attempt #1!

This is the dried napkin on the dark drawer front - notice all the air bubbles?  That's also not the goal.  LOL!

I dried my tears and scraped the napkins off the drawer front (fortunately I had only done one drawer), and painted all the drawers a light colored paint.

Back to square one, I repeated the process, gluing the napkins to the drawer fronts.  This time, things went much smoother and more quickly.


Left a 1/4" overhang on each side which would be trimmed with an Exacto knife after the napkins dried.

After the drawers dried the design was clearly visible!  As I celebrated, I trimmed the excess and then distressed them using 1 teaspoon of Coffee Latte craft paint mixed with 1/8 cup warm water.  Just brushed the diluted paint on the drawer fronts and blotted using the plain napkin layers I had separated from the design napkins.  No waste!

When the drawers were dried I added oil rubbed bronze drawer pulls that I found in my stash - love when that happens - and she was good to go!


Love the "new" look for this treasured old piece.  Have you tried decoupage?  Did you run in to any hurdles along the way?  


 Thank you to Have a Daily Cup of Mrs. OlsonWelcome Home WednesdaySavvy Southern Style Create with Joy and My Flagstaff Home for graciously featuring this post!


Shared with:


{TUTORIAL} DIY Distressed Tabletop


Do you like the distressed look (at least on furniture)?   There are many methods for giving furniture a naturally aged appearance and I really enjoy the dry brush technique.  I recently distressed a tabletop and here's how ...

Supplies:

-- Table top
-- Light colored paint
-- Dark colored paint 
-- 2" foam brush
-- 2" paint brush
-- Sanding sponge - fine
-- Paper towels


Tabletop is a 36" unfinished pine round.


36" Pine Round


Typically I make my own chalk paint using Plaster of Paris, but discovered this Waverly Inspirations Chalk Paint in a shade called Plaster and wanted to give it a try. 


Light Colored Paint

Had the trial size container of Valspar Fired Earth paint on hand from previous projects.


Dark Colored Paint

This foam brush was in stock at our Lowe's.


2" Foam Brush


If you don't have disposable brushes on hand, be sure to stock up.  They're inexpensive, save lots of time and effort on cleanup, and can also be reused. 


2" Paint Brush

The last item needed (other than paper towels), is a fine grit sanding sponge.  The sanding sponge, for me, provides more control than a sanding block and it's especially helpful if you're sanding items with curves or detailing - the sponge conforms to the surface.  

Fine Sanding Sponge


To get started, I sanded the pine round with the sanding sponge to eliminate any splinters or rough areas.  The round is pre-sanded so this went quickly.  After sanding, wipe with a slightly damp paper towel.  You could also purchase tack cloths designed for this purpose but paper towels work just as well.

Using the foam brush, apply a coat of light colored chalk paint to the top and sides of the pine round.  Let dry. 


Sand any remaining rough areas after the paint has dried. Again, follow sanding by wiping with a slightly damp paper towel.


Using the bristle brush, dip only the tip of the brush into the dark paint and wipe bristles with a paper towel, leaving very little paint on the brush. 


Lightly stroke the brush across the pine round in the direction of the wood grain.  Repeat randomly across the entire pine round.  Let dry.


And, that's it!   This technique is very similar to the one I used on the wooden EAT sign and if you missed that post, you can find it *HERE*.

A few more pics of the completed tabletop:


Have you distressed furniture or décor?  Which technique did you use and were you pleased with the results? 

Shared with:

Two Tables = One Bench

I've really debated sharing this project because it's an older one that we did years ago.  The concept itself is share-worthy, but the photo quality is just awful.  Please hang in there and look past the grainy photos - perhaps the idea of combining two unused furniture items to make one usable piece is something that may come in handy for you as well?

We had two end tables that were taking up space in our garage, and about that time I was also wanting a bench that could be placed at the foot of our bed. 


Looking at the two tables sitting side by side, they appeared to be just the size and shape that I was looking for in a bench, although a bit too tall. 

I asked hubby if there was any way he could use them to make a bench and this is what he came up with ...


He shortened the height by sawing off a few inches at the bottom of each.  He turned them upside down side-by-side and installed two hidden narrow boards on the underside of the table tops (where they meet) to connect the tops of the tables.  Then he inserted a board between the two near the bottom that would serve to stabilize them, and would also act as a shelf - this would match the existing shelves at the bottom of each table.


I was thrilled that the plan was coming along!  But, a coat of black paint later, I realized I really didn't like the scalloped design that was formed on the front where the two tables met. 


At this point, my carpenter really did feel that this would be a never ending project!  But, he relented and with the addition of a straight trim board around the top, my vision was realized. 


A little more black paint and time to dry, and the two tables were finally ready for their new life as a bench.


I liked that there were three cubbies for baskets or canvas containers (or curious felines) which meant added storage.  And, I later placed a cushion on the bench.  The additional seating area at the foot of our bed was handy as well.  While we no longer have this item in our bedroom, it was a functional and thrifty option that was fun to make!

Again, I apologize for the horrible photos, but really wanted to show you that sometimes if you think outside the box, you never know what you might come up with - not all projects work out, but you never know until you try! 

Have you created a functional piece from items that you had absolutely no use for?  Please feel free to share! 

DIY Lantern Candleholder

Before this lantern looked like this ....


It looked like this ...


Years ago I bought this old gas lantern and was thrilled that the glass globe was intact, as most of the lanterns I found no longer had them.  It is a Dietz lantern and I  believe was used in barns and by the railroads. 

I had no intentions of using it as originally intended and wasn't concerned with altering it with paint, so envisioned it freshly painted and displaying a flameless outdoor candle on our front porch.  First I cleaned the exterior metal lamp base with a brush and damp cloth.  Then, soaked the glass globe in hot soapy water. 

Next, the search for just the right shade of paint.  In keeping with my usual goal to use what we have on hand, I grabbed cans of Rustoleum Regal Red and Rustoleum Metallic Oil Rubbed Bronze. 


Guessing that the Oil Rubbed Bronze would tone down the red a bit, resulting in a dark red, I mixed the two and got the dark red shade that I hoped for.


Using a small brush I went to work giving the lantern a fresh coat of metallic dark red paint.


Project should be all done ... just reinsert glass globe, slip in the candle and call it good!

Ugh ... not quite!  See that little round slotted protrusion in the center of the base?  That tiny object posed a slight detour to my plan to just slip the candle in.  The bottom of the candle would not rest flatly on the lantern base.

My solution was to cut a 1 inch wide piece from an empty paper towel cardboard center to form a flat pedestal on which to place the candle.  Problem solved!


To dress the candle up a bit and conceal the cardboard pedestal, I wrapped the candle in jute webbing with red detail.  Simply cut a strip of webbing, and use fabric fusing adhesive to create a sleeve to slip over the candle. 


Place the candle on the cardboard pedestal and slip the webbing down to meet the base of the lantern and conceal the cardboard pedestal.


All that's left to do is reinstall the glass globe, although I really like it best without it. 


A nice addition to our recently refreshed front porch!


Have you started a project that seemed effortless, then ran into an issue you had to resolve?  Seems to happen quite often.  I think that's part of the fun, don't you?

Shared with:

Mystery Plant Hanger

We have a building next to Our Gilded Abode that serves many purposes.  It houses our riding lawn mowers and lawn maintenance equipment, our lumber stash, hubby's tools that he uses infrequently, the big monstrous table saw, and basically anything else that we don't want cluttering up the garage attached to our house.  It's also a catch-all for things that are no longer needed but are "too good" to toss. 

As much as I don't necessarily like keeping things that aren't being used, I have to admit that having them has come in handy many times.

So when I decided I needed a bracket or hanger to hang my Boston fern from our back porch post, I knew just where to look for something to use. 

My first thought was to find an old plant hanger that I was no longer using.  And, within 10 minutes, I found just that. 


It would have worked perfectly fine and would have been a quick and easy option - just paint it, attach it to the porch post, hang the plant, and move on to the next project. 

But ........ you KNOW that wasn't going to happen!  LOL  It was a very boring option and not very creative at all.

So, I kept searching in the building and found this:


The perfect shape and  very heavy duty.   Was evident its original purpose wasn't to hang a lovely plant on a porch, but I didn't know what it was.  My first guess was perhaps a squirrel feeder - the kind that you screw a whole ear of corn to the base.

Squirrel Feeder


Plausible, but the curved "arm" didn't seem to serve a purpose. 

Even though I knew that in the end I'd use it as a plant hanger bracket, I wanted to know what it was.  So, I contacted Betsy at My Salvaged Treasures.  She has done some amazing repurposing projects using many types of items.  If you've not seen her wonderful blog, please check it out here.  If anyone would be able to help me identify this item, I knew it would be Betsy and her followers.

Sure enough, they didn't disappoint!  Through Betsy I learned that this item is actually a vintage spool holder that was mounted on the countertop of general stores, bakeries and butcher shops to hold spools of string and twine.  What a neat item! 


Now with the mystery solved, I was ready to implement my new use for the spool holder.  All it took was three long decking screws and the spool holder has a new and useful life as a plant hanger for my Boston fern. 


How do you feel about repurposing antique and vintage items?  I am personally all for it.  Rather than having the spool holder gathering more dust and spider webs in our building, it now has a prominent place on our back porch and is serving a true purpose, albeit not its original purpose. 

Some feel that old items should be maintained in their original condition.  I agree with that to some extent - if the item has extreme monetary value, I wouldn't touch it.  But, I feel that common everyday household items that are not needed for their original purpose should be repurposed and put to good use. 

What are your thoughts on repurposing antique or vintage items?  Please share!


 Thank you to My Flagstaff Home for graciously featuring this post!


Sharing with: