Pages

Hearty and Chunky Tomato Soup

With all the wonderful garden fresh veggies we've been gifted, we had a great supply of ripe tomatoes  We've been enjoying them on salads and as a side with sandwiches, but today we used them all for a super hearty tomato soup.  


We tend to make and eat dishes that sound appealing to us, regardless of the season, so hot soup isn't an unusual summer dish in our home.

To begin, I did my usual vinegar and water soak to remove any little critters that might be hiding out on the tomatoes and bell pepper, then rinsed thoroughly and removed the stems.   The tomatoes varied in size and I cut the largest ones in half and left the smaller ones whole - they'll break down while simmering.


I chopped 1/2 a large red onion, 1 green bell pepper, and a couple of Spring onions/scallions that I had on hand and needed to use up.   


In a large sauce pan I melted 3 tablespoons butter and 2 tablespoons olive oil.  Added the red onion, bell pepper and scallions and sauteed.  At this point I also added my seasonings and I vary them each time I make this.  Today I added Tone's Spicy Spaghetti Seasoning, garlic powder, black pepper and bone broth powder.


Added the tomatoes and stirred well.  


If you've not tried bone broth powder, it's awesome.  Adds great flavor to dishes and the little packets are so convenient.  Sourced from grass-fed, pasture-raised cattle, fresh vegetables, and herbs, spices, and seasonings  I like that it contains about half the sodium of beef bouillon. Great for those of us who don't have homemade bone broth on hand.  This is the one that I used:


Next I covered the saucepan with the lid and simmered, stirring frequently until the tomatoes were cooked through and the soup thickened.  I used my wooden spoon to mash them for instant thickening.  

After picking fresh basil, oregano and rosemary from our plants, I chopped them and added to the soup along with an 8 oz can of tomato sauce.  


Here's where I'll admit that we love a nice warm slice of buttered homemade bread with our soup so I started a loaf in the bread machine.  :)


This soup contains such simple and basic ingredients but honestly tastes so rich and hearty that you'd think it surely is complicated to make.  The onions and bell pepper provide a nice chunky texture to the smoothness of the tomatoes.  And the bone broth and fresh herbs are so flavorful!  Our favorite kind of dish!  

 Your comments are greatly appreciated and I look forward to your thoughts and ideas!  
I try to respond to comments via email as soon as I can.  
If your email address isn't available, I will comment here.  
Thanks so much for visiting ... God bless you and have a beautifully creative day!


Shared with:

Baked Eggplant Parmesan

We were recently gifted three beautiful garden fresh eggplants from a friend's garden and I couldn't wait to treat us to Eggplant Parmesan.  It's a favorite of ours when we eat out and we were hoping for a tasty non-fried version.  This one did not disappoint!


The fresh eggplant were absolutely gorgeous and just ripe.  (Note:  The white squash below were not used in this recipe.)


To begin, I preheated our oven to 375 degrees.  I washed the eggplant thoroughly and cut unpeeled into 1/4" slices.  Next I dredged them in eggs (3 beaten eggs) and store bought Italian seasoned Panko bread crumbs (2 cups), using two shallow glass containers.  Dipped the slices first in egg then in the bread crumbs, coating well.


Placed the breaded eggplant slices on parchment paper (I sprayed lightly with cooking oil) on a baking sheet and baked until slightly brown.  In my oven, baking time was 10 minutes on each side.  You don't want them overly browned because they'll go back in the oven for more baking in the next step.


Remove from oven.


In a large casserole dish sprayed with cooking oil, I added a layer of pasta sauce and covered with shredded mozzarella.


Placed the baked eggplant slices in the dish in rows.


And top with more pasta sauce, mozzarella, parmesan, and fresh chopped basil.


Bake 20-25 minutes or until pasta sauce is hot and eggplant is heated through.  Below I had added remaining pasta sauce I had on hand after baking - heated it through in a saucepan and spooned it over the baked eggplant.


Remove and let sit for 5 minutes.  Serve plated with crusty garlic bread, a nice side salad and, if you like, a serving of pasta.


This dish was so tasty!  We love the combination of the slightly crunchy exterior of the eggplant with the tender center.  It was every bit as good - maybe even better - than the fried version.  We'll definitely make this one again.  Enjoy!

Your comments are greatly appreciated and I look forward to your thoughts and ideas!  
I try to respond to comments via email as soon as I can.  
If your email address isn't available, I will comment here.  
Thanks so much for visiting ... God bless you and have a beautifully creative day!


Bountiful Harvest & Blessings


This Spring and Summer we've enjoyed an almost constant supply of garden fresh produce thanks to our generous friends and neighbors.  While isolating in our home, we've frequently discovered bags of beautiful produce and fruit on our front porch. 


These wonderful harvest gifts include dewberries/blackberries, Beefsteak and cherry tomatoes, zucchini, yellow squash, jalapenos, green beans, pattypan squash, eggplant, kale, lettuce, bell peppers, carrots, and cucumbers.


And as a result, we've enjoyed some amazing side dishes and meals.  Just a few are these:

The Best Berry Cobbler
Stuffed Peppers with Rosemary Seasoned Green Beans

More Berry Cobbler!

Tomato Basil Soup & Cheesy Squash Casserole
Veggie & Cheese Quiche with Julian's Homemade Salsa

Herb Crusted Grilled Squash & Zucchini

We are beyond grateful for these dear friends and neighbors - their generosity means the world to us, and our little small town community is such a blessing!


Your comments are greatly appreciated and I look forward to your thoughts and ideas!  
I try to respond to comments via email as soon as I can.  
If your email address isn't available, I will comment here.  
Thanks so much for visiting ... God bless you and have a beautifully creative day!


Gardening and Herbs

The thought of fresh herbs, ready for picking when needed, is so appealing.  Bottled dried herbs are convenient but just don't compare in taste to fresh ones.  This weekend, we filled two 4 foot long rectangular planters with a variety of herb plants. 


They include:


Tuscan Blue Rosemary
Silver Lemon Thyme
Peppermint
Sicilian Oregano
English Spearmint
Dill
Lemon Mint
Italian Parsley
Mother of Thyme
Italian Oregano
Basil
Ginger

All plants except the Ginger were purchased at our wonderful local plant nursery (20 miles away).  When you live in a super small country town far from a city of any size, 20 miles away is considered local.  We were thrilled to find that the plant nursery had a large selection of beautiful herb plants at very reasonable prices. 

Dill & Lemon Mint

Italian Parsley

Sicilian Oregano & Italian Oregano

Lemon Mint
 
Tuscan Blue Rosemary


Silver Lemon Thyme

Mother of Thyme

Ginger

Peppermint


The ginger was rooted by our son from fresh ginger root. It looks healthy and happy in its new home. 

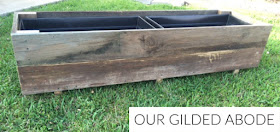
The planter boxes we're using were made by hubby and I several years ago and the tutorial is here:


DIY Wood Planter Boxes


The planters consist of a wood exterior with open, braced bottom on which plastic rectangular planter boxes can be inserted.  Each planter holds two of the rectangular plastic containers.


We're hoping for a great supply of herbs and have plans to use them in several ways.  Will use the majority of them, picked fresh, in recipes, and the excess will be either frozen or dehydrated for later use.  

If we can find Sage and Marjoram plants, I plan to make a dry Italian seasoning mix.

Have you planted herbs to enjoy all summer long? 


Your comments are greatly appreciated and I look forward to your thoughts and ideas!  
I try to respond to comments via email as soon as I can.  
If your email address isn't available, I will comment here.  
Thanks so much for visiting ... 
God bless you and have a beautifully creative day! 


Shared at:

Free at last ... from the decluttering roller coaster

Over the years (now decades), I’ve repeated a cycle of decluttering and organizing.  Seriously ... decades of doing those two things over and over. As if I were just treading water. In fact before she passed, my sweet friend Diana and I had that very same discussion. She mentioned that her family and friends would chuckle when she mentioned she was decluttering and a few even commented that she’d been decluttering for many many years.

Like many of you all, I’ve read tons of books and tried countless organizing tools and gadgets.  I love to organize.  I even love homekeeping - cleaning is something that I enjoy as well.

But when it came to decluttering I always thought the answer was to find just the right organizing tool.

It wasn’t until I read this book (actually I listened to the audio book ... twice) that I realized I had the wrong mindset.  I didn’t need to be looking for better and neater ways to organize the many items I chose to keep ...  I needed to look at them entirely differently. I didn't need to hold each item to determine which feelings they evoked.  In fact, many times emotions weren't even a part of the decision-making process. 


I didn’t need more or better storage containers and bins after all.

In a nutshell, one eye opening aspect of Dana's method is the Container Concept - in it she explains that every space in our home (and even our homes as a whole) can be seen as containers. For example, a shelf can be seen as a container in that there’s a LIMIT to the number of items it is able to comfortably hold.  So rather than search for gadgets that allow me to store even more items on the shelf, she suggests acknowledging that, if comfortably filled, that is its limit.  I determine the number of shelves I dedicate to a particular item, all dependent upon my clutter threshold - mine is very low.  Regardless, our homes only hold so much stuff and by using the processes Dana shares, we're left with items we love, comfortably stored in the spaces our home naturally provides - no need to rush out to buy additional bookcases, wall shelving, clothes rods, storage bins, etc.

For someone like me who loves the creative challenge of finding ways to  neatly store more, this was life changing.  It gave me a total set limit and released me from the exhausting and stressful task of searching to store more in that area.

I realize I’m making this sound overly simplistic ... Dana describes it much better in the book (and gives detail on her simple two question process to determine which items to keep and donate/toss), but I wanted to share in the event that you, like Diana and I, have been spinning your wheels for years or even decades as well, and you’d like to look at things in a whole new way. It may release you, too, from the roller coaster and give you peace and new insight - and the ability to live in your home in the present!

You can find her book wherever books are sold.  And she's also on Facebook, Instagram, YouTube and Pinterest and also has a blog, A Slob Comes Clean.  Be sure to sign up for her free newsletter.

If you do check her out or read or listen to her book, please let me know how you like it. 💕


Learning New Homemaking Skills


The vision of a pantry overflowing with rows of colorful jars containing home canned vegetables and fruits has appealed to me for quite some time.  Along with a freezer loaded with meal-sized containers of produce and neatly labeled packages of meats and poultry.  Add to that shelves brimming with colorful jars of dried fruits and tasty jerky, and you have several of the items on my list of 2020 goals.

Tractor Supply


To achieve this wonderful vision will involve learning a few new homemaking skills.

My canning experience is very limited and began years ago with an ill fated attempt to make pear jam from rock hard pears gleaned from our back lawn tree.  I boiled and simmered those pears for hours, and they never did soften sufficiently for canning.  My second attempt was much more successful and resulted in beautiful jars of lemon marmalade made from an overabundance of lemons we acquired.  That gave me the confidence to someday try it again.

Tractor Supply


My dehydrating experience, however, is nonexistent.  But, I'm up for the challenge.

As I tend to do, I'm going to jump right in and let my overflowing enthusiasm take over.  Equipment has already been obtained in the form of these beauties:


NESCO FD-75A, Snackmaster Pro Food Dehydrator, Gray


FoodSaver FM2435 Vacuum Sealer Machine with Bonus Handheld Sealer and Starter Kit | Safety Certified | Silver


Granite Ware Enamel-on-Steel Canning Kit, 9-Piece

These are all midpriced versions - and the canner may even be on the low end of the price range, as it's a water bath canner and not a higher end pressure canner.  From what I understand, you can use a water bath canner for practically anything except meats and for that you do need a pressure canner.   However, I've read that the Instant Pot can be used as a pressure canner as well, so I may give that a try when I'm brave enough to experiment with canning meats.  (Thanks to the Instant Pot, I've finally overcome my fear of pressure cookers.)

I did tried out the FoodSaver vacuum sealer and it works like a charm although I've not yet tested the jar sealing accessories.

Will update you on each one as I put them to the test!

Do you currently practice food storage in the form of freezing, canning and dehydrating?  What methods do you use and are you pleased with the equipment you have?  What would you do differently if you could?