Showing posts with label Craft Space. Show all posts

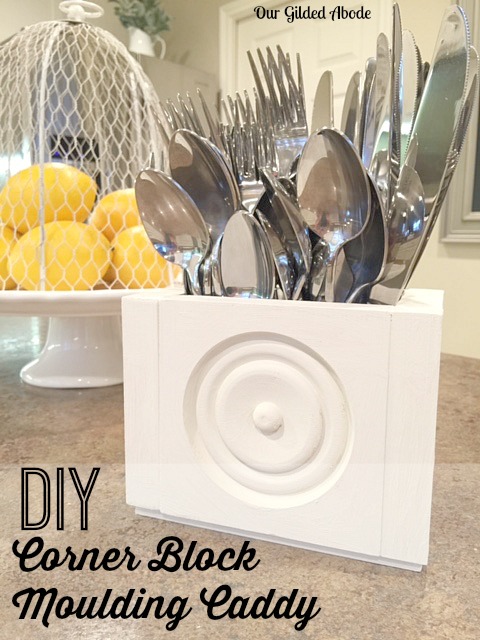
DIY Corner Block Moulding Caddy

We've had 4 pieces of corner block moulding in our scrap wood stash for quite some time and today I gave them a purpose.  


If you're not familiar with these decorative little blocks of wood, they're available in many styles for framing mirrors or door frames. 

We bought them months ago at Lowe's to frame a mirror for our bathroom, but in the process found a ready-made mirror that we used instead.  These cute carved blocks of wood sat unused and unloved until today.

Materials:


4 corner block moulding (4.5" x 4.5" each)
1 5-gallon paint stir stick
Wood glue
Small tack nails and hammer, or brad nailer
Saw
Paint and paint brush
Clamps
Sanding sponge or fine sandpaper


To begin, I lightly sanded the blocks - they were presanded but a few areas needed to be touched up.

Next, I arranged the blocks to form a square.


Then applied wood glue where edges met, and clamped in place to dry.


After the glue dried, I (actually, my gracious assistant) cut 3 equal lengths of the stir stick to form the bottom of the caddy.

I placed the stir stick lengths side-by-side on the under side of the caddy and attached with a brad nailer.


Next was the fun part - painting!  I used leftover ceiling paint that we had on hand - a flat creamy white.


After letting the paint dry, the caddy was ready to be filled.


For now, it's holding silverware on our island.  But, its forever home will be on my craft table, containing a collection of scissors.


I'm repeating myself, but it's so rewarding to make something useful from items you have on hand that aren't being used.

And wouldn't this little caddy also be great as a planter?  Or, crayon caddy?  So many uses!


Your comments are greatly appreciated and I look forward to your thoughts and ideas!  I try to respond to comments via email as soon as I can. If your email address isn't available, I will comment here. Thanks so much for visiting!

Shared with:

What a Difference a Machine Makes

There's nothing better than a new toy, especially one that's hobby-related!   This little beauty came into my life six months ago and I'm having so much fun!


It's the Husqvarna Viking H Class 100Q.

 (Note:  I was not compensated in any way for this post - 
the opinions expressed are my own and reflect personal experience.)


A little background ...

For years I tolerated a super inexpensive (translation: cheaply made) sewing machine that I am fully convinced did not like me.  From the day we brought it home and took it out of the box, it went on strike.  

Everything was a struggle with it - so much so that once I finally got it threaded and the bobbin loaded, I cringed at the thought of having to change thread colors or having the original thread run out!  We won't even get into the stitch inconsistency issues.

I couldn't avoid feeling like a complete sewing failure because when it comes to sewing, I hail from a long line of seamstresses.  My paternal grandmother made beautiful and detailed clothing - all without store bought or digitally downloaded patterns.  She actually used newspaper pages to cut out her own patterns!

As you can guess, I rarely used my challenging machine.  It was far less stressful to keep it in its box hidden in the closet.  I had exceeded the warranty period years ago and was too disgusted with it to pay for attempted repairs.  To be kind, I won't share with you the "pet" name I had given my first machine!

It was nice to know that my source of frustration was out of sight, but each time I glanced at handmade items - beautiful pillow covers, cute aprons or coordinated dinner napkins and table runners, I felt that longing to try again. 

Then one day while browsing in Joann's Fabrics, while resigned to a future of using my trusty fabric glue, their collection of shiny, sleek machines caught my eye and the rest is history.

I was able to test out the machines and the knowledgeable and helpful staff answered all my questions and helped me narrow down the model that best suited my individual (and super basic) needs.

Once selected, I fully expected to happily walk out of the store with my new purchase and tackle unboxing and setting it up at home.  Was beyond surprised when the salesperson unboxed my machine there on the spot, piece by piece and walked me through assembling the attachments, using the built-in needle threader, and winding and loading the bobbin.  

Once I had it all set up and sewed on test fabric, she had me unthread the machine and repeat the steps to ensure I understood the process (maybe she doesn't do that with everyone - my look of fear probably prompted her to do so!). 

The service provided by the salesperson was excellent!

From day one this machine has functioned problem-free.  No struggles to load the bobbin, no tension issues - a trouble-free and enjoyable experience.  


Husqvarna Viking H Class 100Q Sewing Machine

I won't list all of this machine's features but click HERE to find full details.  If you're looking for a basic machine that offers 20 built-in stitches, I highly recommend it. 


To date, I have made six envelope style pillow covers and am working on a vintage-inspired apron (using a store bought pattern!) - something I wouldn't have attempted with my old machine.  Will share more on them later but here's a glimpse at a couple of the pillow covers.

These were made using a Waverly floral print:


And this lovely neutral striped upholstery fabric was a remnant from Joann's:


I am so grateful that I was able to purchase a new and cooperative machine and continue my sewing journey.

Can you relate to frustrations with certain machines?  Were you able to overcome them or did you discover that finding another machine was the solution for you?  Please share!

Thank you to Kathryn at The Dedicated House for kindly featuring this post!


Your comments are greatly appreciated and I look forward to your thoughts and ideas!  I try to respond to comments via email as soon as I can. If your email address isn't available, I will comment here. Thanks so much for visiting! 


Adding Craft Space Storage

Our combination guest room/craft space is a definite work in progress, but we're truly pleased with the changes we've made to date.

One handy addition is this white shelving unit:


It's the Kallax shelving unit from Ikea and it fits really well into this space.


Kallax from Ikea

It replaces this Leksvik bookcase (also from Ikea but no longer available) that was a little too wide.


Through the years, we've found Ikea pieces to be super sturdy and long lasting.  In fact, the Leksvik bookcase above is many years old and is still in perfect condition. 

Another positive is that Ikea items are easy to assemble - this came in very handy as I tackled this on a day hubby was out of town.

To my benefit, there was a nice booklet with illustrations for each step of the assembly, along with a bag of all hardware, wall anchoring brackets, and even an assembly tool - everything you need in one box.

 
Speaking of boxes, here's where I have to confess that the box was VERY HEAVY - it weighed 67#!  And, as fate would have it, it was still in the back of my SUV and hubby wasn't home when I decided to assemble it.

Being stubborn ... uh, rather ... being determined, I left it in the back of my vehicle, opened the box and brought the contents inside in manageable trips.  :)

That was honestly the most difficult step of the assembly - putting it together was a breeze.


Another impressive feature of the Kallax series is that the base, top and sides of the shelving unit are each approx. 1-1/2" thick.  


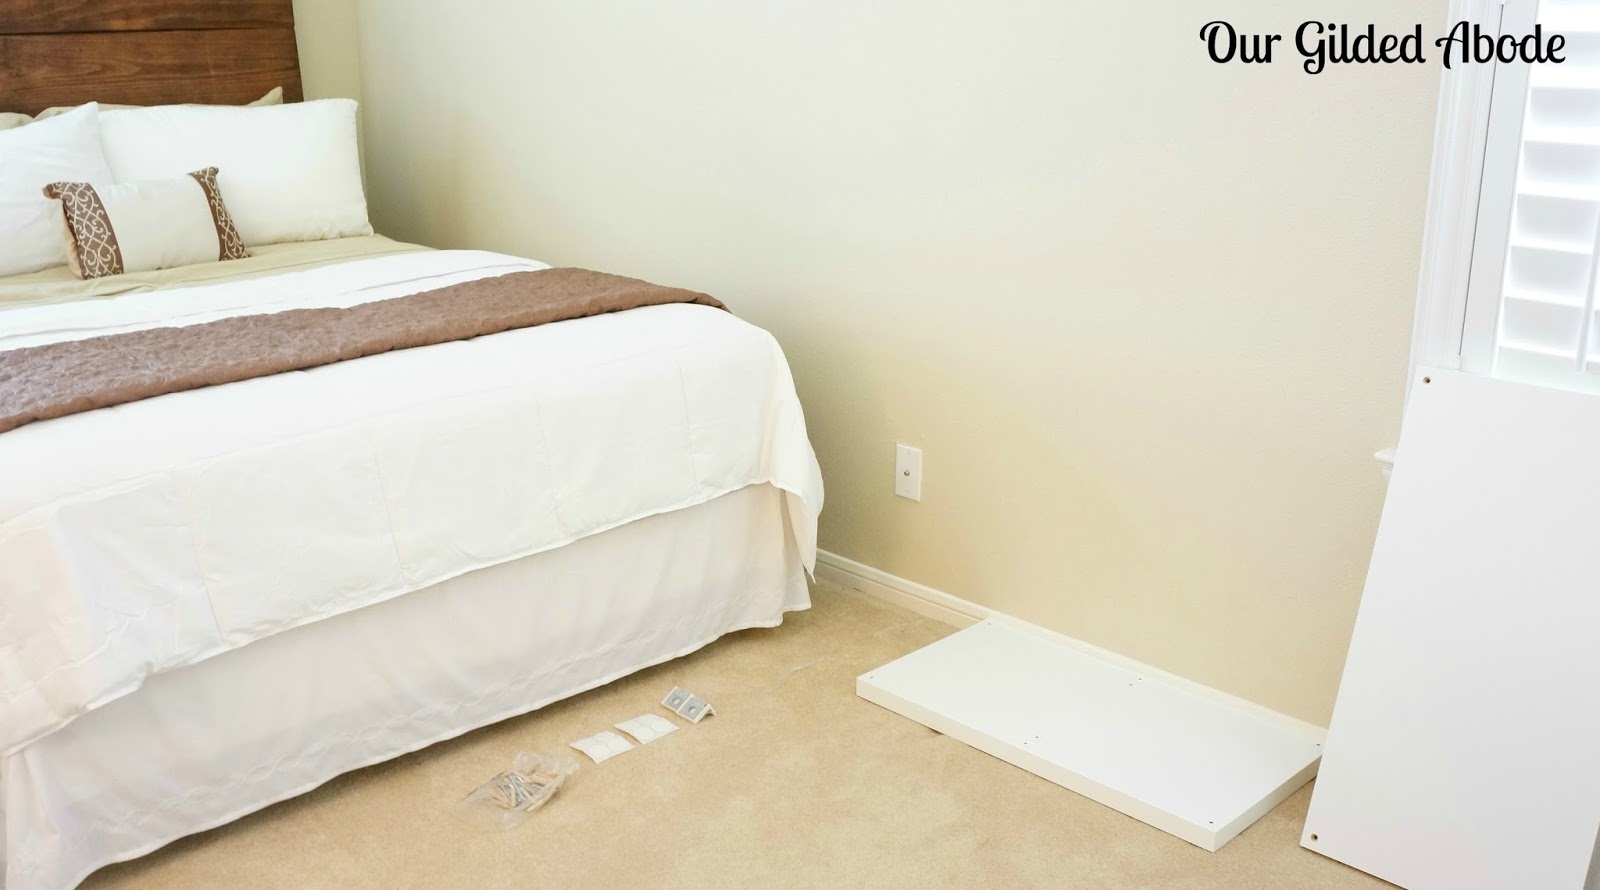
Before investing time in putting it together, I placed the base on the floor to ensure the size worked well and it did.


Above is a sneak peek at another new addition to the room - a DIY wood plank headboard - more on that soon!

A handy tip for using a rubber mallet is to cover the mallet head with a soft cloth (or in this case, an old sock!) to prevent damage or black marks on furniture pieces.  And you guessed  it - I learned this the hard way ... fortunately, marks were easily removed.


Following the instruction booklet, the shelving unit went together easily in about an hour.  


We really do like the crisp clean lines and it provides great options for craft storage and organizing.

Standard fabric storage cubes fit perfectly and are available at most home decor stores.  Or, Ikea offers drawer inserts and door options as well.  


Do you have any Ikea pieces in your home?  Are you as pleased with them as we are?  Have you been brave enough to attempt assembling any yourself?  :)


Your comments are greatly appreciated and I look forward to your thoughts and ideas!  I try to respond to comments via email as soon as I can. If your email address isn't available, I will comment here. Thanks so much for visiting!  


Shared with:

Shopping for a Craft Space

Setting up a craft space is a lot of fun, and checking out the many options available for seating and accessories is even more exciting!

Wanted to share with you a few fun things I discovered during a recent trip to Ikea and At Home that would be great for a craft space.


 (I was not compensated in any way for this post - 
the opinions expressed are my own based on my personal experience.)

My first stop was Ikea.  The above cart is a big hit on Pinterest and is available in dark gray, turquoise and beige.  It's the Ikea Raskog utility cart and is reasonably priced at $29.99.  The middle tray is even adjustable.  Isn't the turquoise cute?

The utility cart below is the Risatorp.  It's available in white, the baskets are generously sized and the bottom basket would be perfect for large sheets of card stock.  Wouldn't this also be a great portable cart for corralling all the supplies you need for a current project?


This is probably my favorite of all the items I saw ... it's the Pressa hanging dryer with 16 clips, and looks like an adorable chandelier.  It comes in white, red and black!  If I had a place to hang it, it would have come home with me.   I personally would use it for drying paint brushes, but envision it also for displaying cards and photos.


When I saw the Dignitet curtain wire (below), it struck me as being a neat way to display crafting scissors and tools - using ring clips.  


Next is the Spontan steel magnetic board.  It looks sleek and modern and is 14-1/2" x 20-3/4" - all for only $12.99.  A couple of these mounted side-by-side above a craft table would be awesome.


While at Ikea, I also checked out the chairs and stools.  

This one is the Roberget - it's metal and adjustable.  The turquoise color is so fresh and fun (it also comes in grey) - would look so cute in a craft space, along with the Raskog turquoise utility cart!


Another interesting seating option is this wicker adjustable chair.  It's the Gregor and available in white, light beige, and gray.  I may have to go back and get this one!


An item that did make the trip home with me was this Dalfred adjustable bar stool in black.  I really liked the way it looked in my craft space, but the height wasn't quite right, so returned it.  Am still searching for the perfect chair or stool.  


After leaving Ikea, I popped in At Home (formerly Garden Ridge) for a quick look at their many counter and bar stools.  The one below immediately caught my eye.  Unfortunately, as with the Ikea Dalfred stool above, the height was not quite right for my space.  But, the smooth brushed steel and sleek lines of the stool were very appealing.


Searching for craft space items that work well is just as much fun as actually acquiring them!  And, each time I visit Ikea and At Home, I find something new - such fun stores for browsing and gleaning ideas and inspiration. Do you have Ikea and At Home stores nearby?


Thank you to Tracy at At Home with Sweet T for featuring this post at Welcome Home Wednesdays!!! 


Your comments are greatly appreciated and I look forward to your thoughts and ideas!  I try to respond to comments via email as soon as I can. If your email address isn't available, I will comment here. Thanks so much for visiting! 


 Shared with:
(I was not compensated in any way for this post - 
the opinions expressed are my own based on my personal experience.)

Frugal Craft Space - File Cabinet Makeover

After years of having our kitchen island serve as my craft table, I am excitedly creating a craft space in our guest room where craft supplies and equipment can remain set up and ready to go!  I envisioned a large craft table supported by two 2-drawer file cabinets.  The cabinets provide great storage, but were less than attractive and desperately needed a makeover.


The first criteria for the new craft space was to be frugal and to use items we already had on hand whenever possible - basically, the same criteria for any project we undertake. No surprise there!


 Supplies:

Two metal 2-drawer file cabinets
Four decorative drawer pulls
Zinsser 123 Primer
Latex Paint
12 large wood paint stir sticks
Paint brush
Mitre saw box or hand saw 
Loctite Power Grab adhesive
220 grit sandpaper
Wood filler


We already had one file cabinet and located another of the exact same height at a local thrift store for only $15.  Along with being thrifty, an added bonus is that older metal file cabinets are made really well and provide sturdy and secure support for heavy tabletops.  


Gave them a quick cleaning and lightly sanded to rough the paint up and smooth any scratched areas.  

I also removed all the hardware on the front of the drawers because I wanted to add decorative drawer pulls and hopefully have the cabinets look more like furniture and less like industrial office equipment.

Hubby drilled holes for the decorative drawer pulls I bought at Hobby Lobby.  The four pulls cost a little over $8.

Next I painted the cabinets and drawer fronts with a coat of primer - Zinsser 1-2-3.  This stuff is amazing - is thick and goes on smoothly and evenly - great coverage.  I've used it on metals, wood and plastic with great results.  


This is where the project took a slight detour.  Instead of following my instinct and immediately framing out the drawers, I decided to try covering the drawers with birch paper.  Love the look of birch - it had to turn out great, right?  


Well ... it didn't look "bad," just not the look I was after in the space that I had envisioned.  Lesson learned!


To get back on track, I painted over the birch paper and let it dry. 

Then I grabbed our handy little mitre saw to cut the wood stir sticks to frame out the front of each drawer.  No fancy angled mitre cuts - just straight cuts.

Mitre Saw Box

The 5 gallon size wood stir sticks are surprisingly straight.  We had several, but not nearly enough to frame all the drawers.  Took a trip to the paint department at Lowe's and asked to buy 12 of them - did not expect them to just give that quantity to me at no cost.  Surprisingly, that's exactly what happened!  A pleasant surprise!

When all the wood pieces were cut, I adhered them to the drawer fronts using Loctite Power Grab adhesive.  This is another product that I use a lot for all types of materials.  It instantly adheres, but is repositionable for up to 15 minutes.  And, it comes in a convenient  resealable tube - so much easier than a bulky caulk gun.  No mess and no waste.


Loctite Power Grab


After letting the adhesive dry, I filled any gaps with wood filler, let dry and sanded.  Then it was finally time for paint!


I used a white interior latex satin paint from my stash - in Sherwin Williams Downy.  

And, the cabinets are now exactly as I had first envisioned - fresh and clean and ready to be filled with fun craft supplies.


Hope you enjoyed this little sneak peek at my new frugal craft space and I'll be back to share how we installed the table top, along with more of the "in progress" details!


Your comments are greatly appreciated and I look forward to your thoughts and ideas!  I try to respond to comments via email as soon as I can. If your email address isn't available, I will comment here. Thanks so much for visiting! 


 (I was not compensated in any way for this post - 
the opinions expressed are my own based on my personal experience.)


Shared with: