Showing posts with label Kitchen. Show all posts

Big and Fluffy Belgian Waffles

We've always enjoyed waffles ... store-bought or homemade ... we like them all!  And when we saw a recommendation for a particular waffle maker, I took notice.  


Our waffle maker is over a decade old and quite fidgety.  It doesn't cook evenly, requires lots of oil or butter to keep from sticking, and takes forever to preheat.  And, did I mention that it's a nightmare to clean?

We ordered this Presto FlipSide Belgian Waffle Maker and it arrived today.  Of course, we had to try it out immediately. 


It comes with a few recipes and we made the Basic one .... flour, sugar, baking powder, eggs, oil, salt and milk.  That's it!


In a few short minutes, we were pouring a cup full of the batter onto the center of the preheated ceramic nonstick waffle grids (I call them plates). Close the lid and flip it 180 degrees to evenly coat the grids.  I really believe that's the secret ... evenly coating the cooking surface.  My waffle maker lacked the flip feature and waffles came out misshapen and quite wonky.  


After pouring the batter in, closing and flipping, and waiting 4 minutes (there's a built-in timer), they're ready.  Open the lid, remove the thick and nicely browned waffle that's crunchy on the outside and tenderly soft on the inside.

Layer on your favorite toppings - we like real butter with honey or maple syrup.  But, mixed berries and sliced bananas, or chocolate syrup and a dollop of whipped cream are really nice as well.


Thank you to Lana who commented on it at Blue House Journal!

I will certainly recommend this waffle maker to anyone and everyone!  If you have one or if you purchase this one, please let me know how you like it!  Bon appetite!


Sleek Stainless Kitchen Backsplash

When we built our little home years ago, we were undecided on what to do with our kitchen backsplash.  So, we put that project on the back burner and settled in with a coat of paint ... until now. 


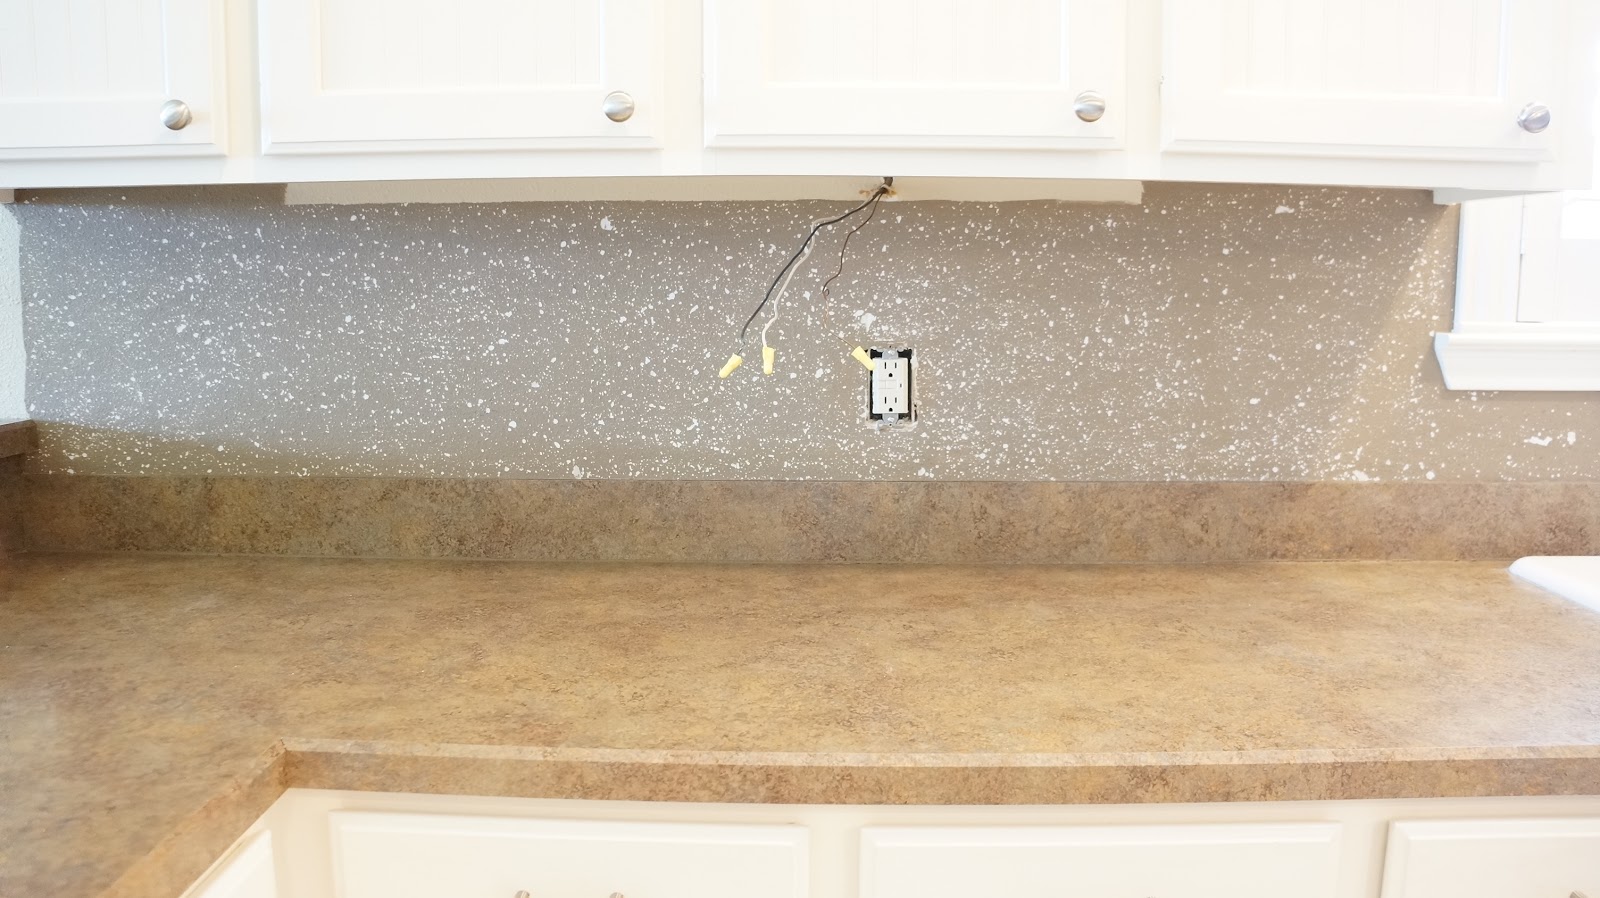
This was our boring but clean slate:


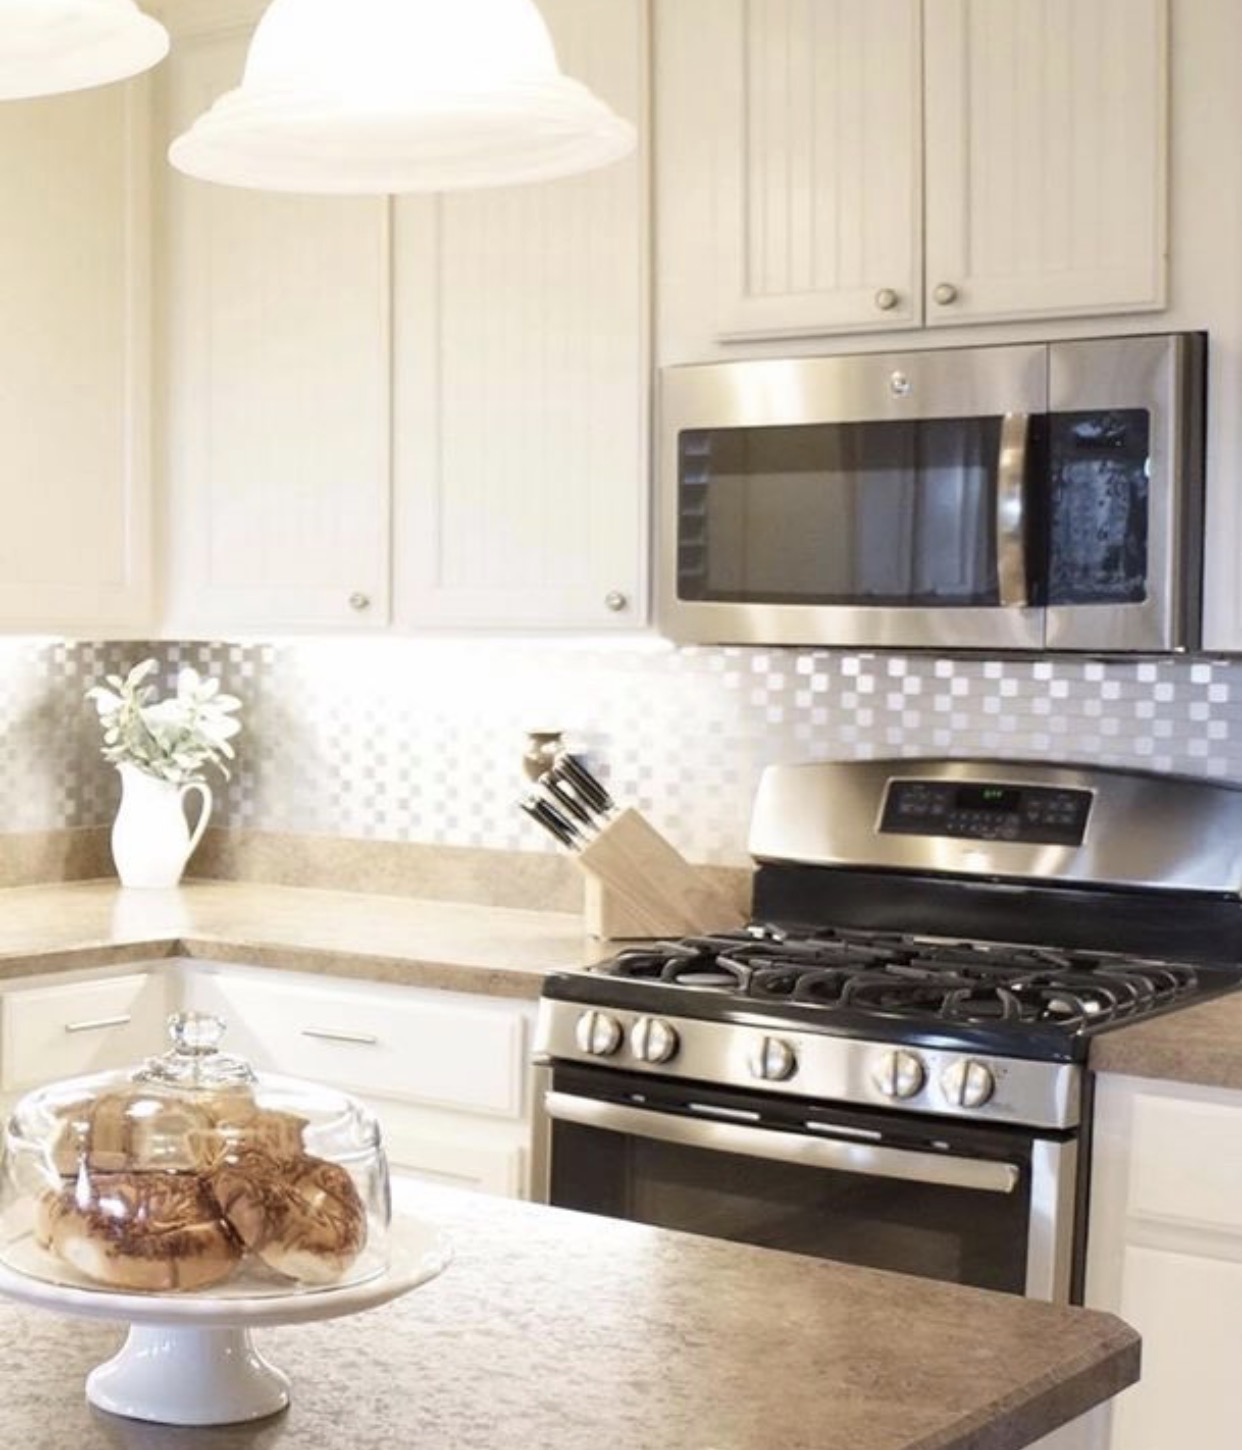
To narrow down our backsplash material choices, we knew we wanted a clean, sleek look without grout lines.  That's when we found these sheets of stainless tiles at Lowes:


They come in 12" square mosaic sheets and are self-adhesive.  

To prep our wall, we lightly hand sanded and wiped to remove dust.  


We chose to leave the 4" vertical countertop backsplash along our wall, but could have removed it to have the backsplash meet the horizontal countertop.  This was just our personal preference to leave it in place.


We also decided to replace our fluorescent undercabinet lighting with LED lighting.  Best decision ever!  The LED lighting is so much brighter and whiter.   

These were the light fixtures we chose at Home Depot:


http://www.homedepot.com/p/GE-Enbrighten-24-in-LED-Direct-Wire-Under-Cabinet-Light-34289/300049749


To install the steel mosaic sheets, we started in the corner and began applying full sheets of tiles along the bottom row.  This was the fastest and easiest row to install - no cuts!


To make custom cuts around our window frame and outlet openings, we used small tin snips.

We're really pleased with how easy these steel tiles were to work with and we're enjoying the sleek and clean look of them.  They're also super easy to maintain.  If you're looking for a groutless backsplash material, please check them out.


 Shared with:
The Interior Frugalista

2016 Christmas Decor

It's starting to look and feel a lot like Christmas ... the presents are wrapped, the mantel is aglow, and our home is an explosion of glittery gold, bold red and deep green.


This year's mantel is decked out in three layers of garlands ... a base of vertically strung pinecones, and a lighted spruce garland, topped off with a gilded cascading garland.  Instructions for the DIY pinecone garland are HERE.


Above the mantel, a traditional spruce wreath with gold and red ball ornaments is surrounded by a gold open picture frame and a symmetrical arrangement of glittery cutout gold stars and red trees, red felt cone trees, and copper lanterns filled with gold wrapped candles.

A splash of red also warms the hearth area - this darling wood step stool painted with shiny red enamel was built by hubby's grandfather many years ago and is the perfect perch for the vintage red truck and tree.  Surprisingly, our gold painted Thanksgiving pumpkin appears to be alive and well to shine on through Christmas.


On our coffee table, a large clear glass cloche filled with red glass ball ornaments is resting on a gold framed mirror tray.  In reality, it's not a tray at all - it's a wall mirror found at Target.  Nice when items can do double duty.  

Accompanying the cloche is a little red lighted vehicle with Christmas tree.  It was originally green and received a festive makeover with red paint.  Read more about that HERE.


The two slipper chairs in the living room are adorned with red rosette pillows, and my thrifty find of the season ... a dark grey plush throw with super large fluffy pom poms.  I was thrilled to find it at Tuesday Morning for only $14.99!!!  If you're searching for these, they also had them in ivory and a light tan.


In a break from tradition, this year's large living room tree is decorated all in gold, with burlap garland and gold raffia.  It rests in a burlap filled galvanized container.  To see how we set up the tree container, click HERE.


The topper is a gold star with white lights, and glittery gold cascading sprays.  The sprays were found at Lowe's and the star topper at Target.  Tree ornaments were all items we had on hand.


Instructions for making the burlap and book page stocking ornaments can be found HERE.


The foyer decor (adjacent to the large tree) is simple and consists of a lighted tabletop urn centerpiece on the foyer table, and a simple  door wreath.

Our gift wrapping color theme this year is a combination of metallic gold, white and black.  I created and cut the gift tags from black card stock using my Silhouette Cameo, and shiny gold paper fills cutout tree openings in the tags. 


Names were written on the tags with a metallic gold Sharpie (from Lowe's).


In the dining room, a new addition this season is the hot beverage bar on the small antique chest.  The chest is just the right size for all the goodies needed to enjoy a hot cup of coffee, tea, spiced cider or cocoa.  In addition to the Keurig and K-cups, add-ins are ready to go - chocolate chips, marshmallows, flavored coffee creamer, sprinkles, candy cane stirrers and cinnamon.


The dining room table centerpiece is another large glass cloche, filled with red and gold glass ornaments and surrounded by gold and red beaded garland.  This cloche is displayed on a farmhouse style carved round wood tray with metal handles.  The tray was from Decor Steals and came in a set of two.    


A counter height bar separates our kitchen from our dining room and it's a great place for two lighted 4' counter trees in urns.  They're decorated with the handmade cinnamon ornaments from last year (instructions found HERE and HERE). 


Next to each lighted counter tree are small gold metal ornament stands loaded with red and gold ornaments and "skirted" with red berry candle rings.  The gold metal stands were Goodwill finds this summer.


If you're still with me, have you noticed that pillows move around a lot in our home?  :)

In the kitchen, we continue the explosion of festive red.  Our kitchen is typically very neutral and at Christmas the red really makes it come alive.  


The light fixture above the island is dressed up a bit with green garland and red and gold tinsel wreaths.  A similar wreath is also centered on the garland at the kitchen sink window.  

Our framed Christmas countdown is in full swing on the kitchen counter, along with a mug of hot cinnamon flavored candy canes in a holiday mug perched on a white and gold dotted cupcake pedestal.  A trio of glittery gold cone trees add a little sparkle to the top of the fridge.

The trio of cracked glass lighted orbs on the counter remain year-round because we enjoy them so much.

A white ceramic soup tureen is great for displaying Christmas crackers/poppers (which do you call them?) until Christmas day and a chubby little Santa is keeping them company.


Wrapping up this holiday tour, our master bedroom has a touch of glitz in the form of tinsel trees and matching gold wreath.


How is your holiday decor coming along?  Are you just beginning to decorate, shop for gifts and plan your menu?  Or, have you finished and are now breathing a sigh of relief?


Your comments are greatly appreciated and I look forward to your thoughts and ideas!  I try to respond to comments via email as soon as I can. If your email address isn't available, I will comment here. Thanks so much for visiting!

Shared with:

DIY Corner Block Moulding Caddy

We've had 4 pieces of corner block moulding in our scrap wood stash for quite some time and today I gave them a purpose.  


If you're not familiar with these decorative little blocks of wood, they're available in many styles for framing mirrors or door frames. 

We bought them months ago at Lowe's to frame a mirror for our bathroom, but in the process found a ready-made mirror that we used instead.  These cute carved blocks of wood sat unused and unloved until today.

Materials:


4 corner block moulding (4.5" x 4.5" each)
1 5-gallon paint stir stick
Wood glue
Small tack nails and hammer, or brad nailer
Saw
Paint and paint brush
Clamps
Sanding sponge or fine sandpaper


To begin, I lightly sanded the blocks - they were presanded but a few areas needed to be touched up.

Next, I arranged the blocks to form a square.


Then applied wood glue where edges met, and clamped in place to dry.


After the glue dried, I (actually, my gracious assistant) cut 3 equal lengths of the stir stick to form the bottom of the caddy.

I placed the stir stick lengths side-by-side on the under side of the caddy and attached with a brad nailer.


Next was the fun part - painting!  I used leftover ceiling paint that we had on hand - a flat creamy white.


After letting the paint dry, the caddy was ready to be filled.


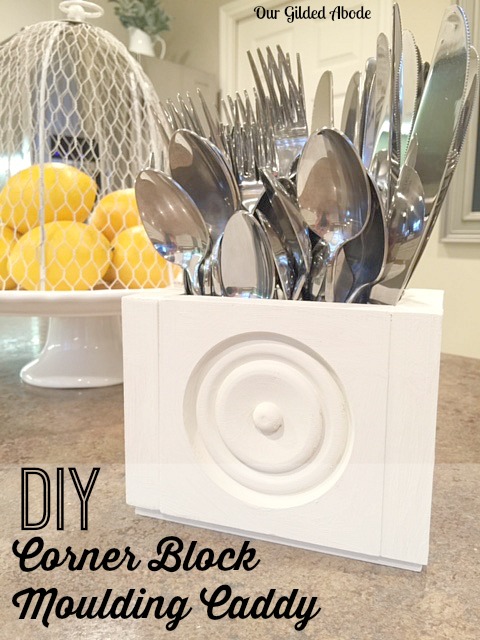
For now, it's holding silverware on our island.  But, its forever home will be on my craft table, containing a collection of scissors.


I'm repeating myself, but it's so rewarding to make something useful from items you have on hand that aren't being used.

And wouldn't this little caddy also be great as a planter?  Or, crayon caddy?  So many uses!


Your comments are greatly appreciated and I look forward to your thoughts and ideas!  I try to respond to comments via email as soon as I can. If your email address isn't available, I will comment here. Thanks so much for visiting!

Shared with: