Frugal Front Porch Refresh - the Reveal!

Well, our tiny front porch is finally presentable!   It was basically a blank slate with only two chairs, red pillows and a black rubber door mat.  Not exactly a cozy first impression. 


But now ... it's a comfy little space to enjoy a tall glass of sweet iced tea on a hot summer day.


At this point I should probably warn you ... this is going to be a looooong post with tons of photos!  You may want to grab that glass of sweet iced tea and find a comfy chair!

The backdrop for our porch is wall paint in Sherwin Williams Softer Tan and our front door is Rustoleum Regal Red.  The existing black chairs received a good (although a bit late) Spring cleaning and a fresh coat of black spray paint.

My inspiration piece was this multicolored door mat - love the color combination. 


Was happy to discover the door mat incorporated our existing deep red, along with dark aqua and bright green.  This allowed me to exercise my frugality and keep the deep red pillows that were already on the porch chairs.  A win-win! 

Another frugal find was this ceramic garden stool!  It was the last one at our nearest Costco ... and, would you believe it was only $19.99?  Have been wanting one for quite a while, but just couldn't bring myself to pay the $50-80 for the ones I drooled over at Home Goods and Target.  You better believe this one was in our shopping cart the moment I saw it - and, I guarded it all the way to our vehicle!  


Next was to add a pop of color with the addition of patterned pillows for the chairs, to coordinate with the existing deep red pillows.  After not finding any ready made pillows that I liked, I decided to try making them, even though I don't sew (well, I don't sew well). 

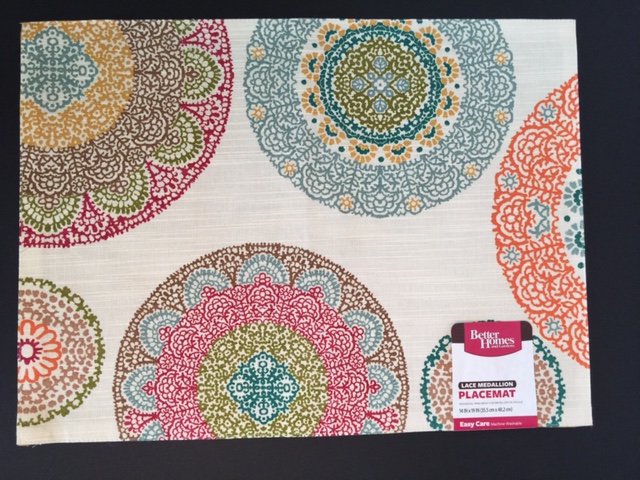
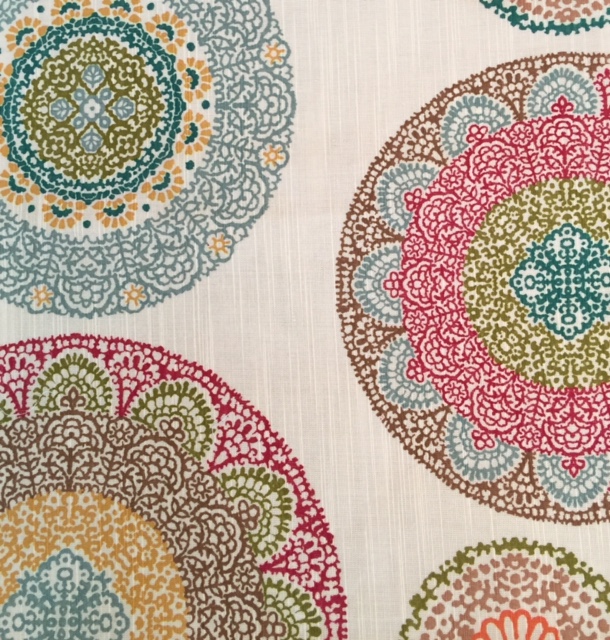
I stumbled across these fabric placemats at Walmart (our only shopping source locally - all the fun stores are at least an hour away).   Couldn't believe that they contained all the colors I was looking for and I recalled that pillows could be made out of placemats by ripping a small opening in one of the seams and filling with pillow stuffing.  At less than $4 each, they were in keeping with my frugal porch mindset. 


I didn't even have to buy the stuffing.  So glad I kept two old pillows that had faded - had planned to recover them but instead, I used the stuffing in the new placemat pillows.


To seal the seam opening without sewing, I used Aleene's Fabric Fusion Quick Dry Adhesive:


This stuff is amazing - works quickly and was super easy to use.  I applied the adhesive to the seam opening and pressed firmly to close.  Just to be sure that the opening stayed shut while drying, I placed big binder clips on the seam to clamp it shut.  Worked like a charm!  I sprayed the pillows with Scotchguard Fabric Protector and they were good to go.

Next, I searched my stash of items for something to hang on the wall behind the chairs.  So many things would work well, but I wanted to add a bit of texture, so chose a metal wall pocket and filled with natural elements, surrounded by a large empty frame. 

The wall pocket was a dark brown but of course I couldn't leave it that way.  I wanted it to be a distressed aqua.  Mixed two craft paints that I had on hand - Fern Green and Turquoise - and applied the paint to the pocket with ... you guessed it! .... my fingers!  Best paint applicators ever.


The picture frame would probably look best in black, but I love its gold distressed finish and don't want to paint it so will leave it as is.

We're almost finished - I promise!  All that's left to do are plants and a rug!

The rug is from Lowe's and is an Allen + Roth patio area rug in natural.  At 5 ft 3 x 7 ft 4 in, it was perfect for this small space. 


Last but not least ... plants!  I added a Boston fern on a stand, a small pot of white Vincas, an arrangement containing a Dracaena, red Vincas and Sweet Potato Vine, and potted white Pentas.  I dressed the Pentas up a bit by wrapping with burlap and tying with jute string.  Added a strip of red/natural jute upholstery webbing, and to give it a little bling, inserted brass brads through the webbing. 


A small red metal lantern completed the décor.  The absolute very last thing I did was paint the front door "wreath" frame.  Used the same mixture of craft paints used on the metal wall pocket.  


That wraps up our little front porch refresh!  Hope you enjoyed this lengthy tour of our home's smallest space. 

Will leave you with a few more pics ... And, if I ever learn how to use my really nice camera, photos should improve considerably.  :)


 Thanks for hanging in there!  


 Thank you to Must Love Home and A Delightsome Life for graciously featuring this post!


 Shared with:


{TUTORIAL} DIY Fourth of July Vase Filler

If you find you're short on time but need a little something to complete your Fourth of July table scape or mantel, this is a quick, easy and frugal option.


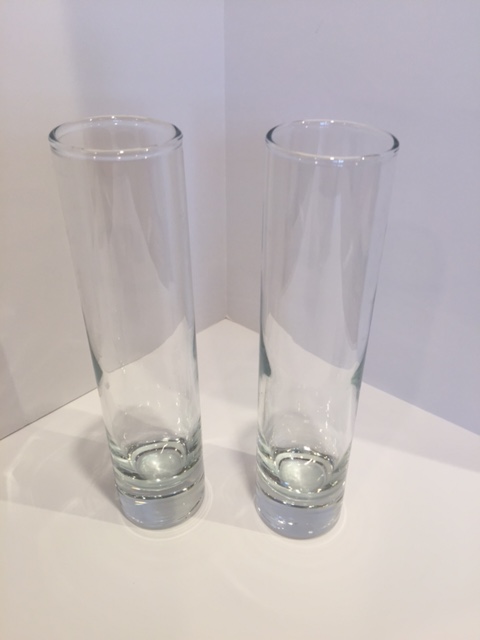
The tall clear vases can be found at Dollar Tree and the vase filler is made with items you probably already have in your pantry.

Supplies I used:
  • Clear vase
  • White rice (uncooked)
  • Food coloring
  • Ziplock sandwich bags
  • Flameless votive
  • Bow


To begin, pour 1 cup white rice into a Ziploc bag.  Add food coloring.  Start with a small amount - you can add more incrementally if you need a more intense color.


Seal bag and knead the bag to work the color into the rice. 


Once you've reached the desired color, pour rice onto paper towel to dry for 20 minutes.  After 20 minutes, rice is ready to place in vase.


Using a small (1 tablespoon) scoop, I placed a scoop of red rice into the vase.  Then, using the handle end of a wooden spoon, I pressed the rice firmly into the vase.  Do the same with the white rice (uncolored) and then blue.  Repeat layers until vase is filled 2" from top, allowing space for candle.


Add a festive bow and a flameless votive and you're all set! 

 
This is a great "go to" vase filler option for any occasion - just choose food coloring to coordinate with your décor.  And, filler can be reused.  Store in sealed bags between use.
 
Enjoy!


Sharing with:


Front Porch Refresh ... In Progress

You know that feeling of having lots of projects going, but none are quite completed?  That's exactly where I am right now.  

Wanted to give you a sneak peek at my front porch refresh plan in progress.  Our front porch is teeny tiny which is good and kind of bad.  Good because it doesn't take a lot of expense to decorate and not-so-good because, with limited space, the pieces I choose have to have a bigger impact without looking cluttered.  My plan is to mainly use items I already have - with a little repainting and tweaking.  Nothing elaborate - just a small space that makes me smile.  :)

Two items that will remain are our black chairs and red pillows.  The chairs will get a fresh coat of black paint. 


These are some of the materials I'm working with ... at least at the moment:


 Am hoping to wrap this up in the next several days and will be back to share the "after!"


Follow

Nine Ways to Add Burlap to Your Decor

Hi, my name is Carolyn and I'm addicted to burlap. 

There, I said it!   Although, admitting it doesn't necessarily mean I have a sincere desire to change.  :)

How could anyone not love burlap?  It's inexpensive, looks natural, is easy (although slightly messy) to work with, comes in a variety of colors and even patterns, and is readily accessible. 

If you like burlap but aren't quite sure where you can fit it into your décor, here are a few examples from around our home:


Burlap tucked between objects in a vignette - as filler and to add texture and softness


Burlap monogram -
Cut monogram out of thick cardboard, cover in burlap using hot glue and outline with brass thumbtacks. 
Wooden laser cut frame purchased at Michaels and spray painted Rustoleum Heirloom White


Burlap runner - Cut to size and fringe all four sides - no sewing needed


Wreaths - Cut strips of burlap and tie to wire wreath form
 
 
Burlap backing for framed monogram
 

Burlap charger (purchased at Hobby Lobby) to brighten a dark bookcase


Burlap trees - cover Styrofoam cone forms with strips of burlap using hot glue.
These were then spray painted with metallic gold paint.


Dress up a plain candle - wrap with burlap trim and tie with a pretty ribbon.  Easy peasy!


Burlap drum lamp shade purchased at Lowe's

 
Looks as if I'm bordering on overuse of burlap .... maybe it's time to introduce a new material to my décor? 
 
In what fun ways have you used burlap in your home and your décor? 
  
 
Sharing with:


{TUTORIAL} DIY Interchangeable Book Page Wreath

I'm still crazy about book-related décor and crafts, even though they've been around for years.  I like them all ... wrapped candles, gift wrap/embellishments, rolled pages in a cloche, you name it ... they're all wonderful!  My book page obsession is only rivaled by my love of burlap and using numbers and letters in décor.  We all have our weaknesses, right?!?

A favorite project was this book page wreath with interchangeable centers.  It's wonderful to have one wreath that can be customized for each holiday or occasion - and it's a plus to not have multiple wreaths to store.  One wreath does it all!


Supplies for wreath:
  • Cardboard
  • Book pages (10 pages, mine were 7-1/2" x 5")
  • Hot glue gun
  • Stapler
  • Scissors
  • Velcro dots (not shown below)

Supplies for decorative centers:
  • White glue
  • Valspar Satin Fired Earth paint or Americana Acrylic craft paint in Bittersweet Chocolate
  • Scissors
  • 4" cardboard drink coasters (8 pack from party supplies section at Dollar Tree)
  • Small paint brush
  • Tan colored copy paper
  • Velcro dots (not shown below)


Let's get started!

To begin, cut a 9" circle from the cardboard.  This will be the base of the wreath.  Punch a small hole through the cardboard to provide a hole for hanging. 

Using a cardboard coaster, trace coaster at very center of wreath form.  Draw circles out from the center circle, spacing approximately 1" apart. These circular lines will serve as a guide for book page placement later.


Cut book pages into 6 evenly sized pieces by folding book page in half and then in thirds.  .


Fold each small piece in half but do not crease the folded end.  It should form a loop.  Staple the open end of the loop. 


Using hot glue gun and starting on the outside edge of the wreath form, glue the folded loops of book pages on the wreath form with sides touching. 


Repeat this process offsetting each row but leave the center circle unfilled - this space is reserved for the decorative centers.  When completed your wreath base will look like this:


Place a piece of Velcro in the center (not shown above) and that completes the base of the wreath.


Now, let's make the decorative centers!

The coasters I purchased had a shiny scroll design on one side and plain cardboard on the other.  I painted both sides and tried two paints that I had on hand - Valspar Fired Earth and Craft paint in Bittersweet Chocolate.  Both worked equally well.


For the center designs (Merry Christmas, Happy Birthday, etc.) I created them in Microsoft Publisher.  You can use Word or any program that works well for you.  Print (I used tan copy paper) and cut out. 


Using the small paint brush or better yet ... your fingers! ... glue the design to one side of the coaster using white glue.  Let dry.  On other side of coaster, place a piece of Velcro. 

For those times between special occasions, I display a monogram center.  It's been fun to create different designs and layouts.


You now have a wreath with multiple decorative centers that can be changed out for each holiday or special occasion.  No extra clutter or storage dilemmas.  Hope you enjoyed this tutorial and if you make one, I would love to hear how you like it.  Enjoy!


Thank you to Create with Joy, Sew Can DoCozy Little House and Stone Cottage Adventures for graciously featuring this post!


Sharing with:
The Dedicated House @ Make It Pretty Monday
The Dedicated House @ Before & After Wednesday