Do you like the distressed look (at least on furniture)? There are many methods for giving furniture a naturally aged appearance and I really enjoy the dry brush technique. I recently distressed a tabletop and here's how ...
Supplies:
-- Table top
-- Light colored paint
-- Dark colored paint
-- 2" foam brush
-- 2" paint brush
-- Sanding sponge - fine
-- Paper towels
Tabletop is a 36" unfinished pine round.
 |
| 36" Pine Round |
Typically I make my own chalk paint using Plaster of Paris, but discovered this Waverly Inspirations Chalk Paint in a shade called Plaster and wanted to give it a try.
 |
| Light Colored Paint |
Had the trial size container of Valspar Fired Earth paint on hand from previous projects.
 |
| Dark Colored Paint |
This foam brush was in stock at our Lowe's.
 |
| 2" Foam Brush |
If you don't have disposable brushes on hand, be sure to stock up. They're inexpensive, save lots of time and effort on cleanup, and can also be reused.
 |
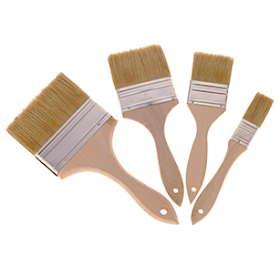
| 2" Paint Brush |
The last item needed (other than paper towels), is a fine grit sanding sponge. The sanding sponge, for me, provides more control than a sanding block and it's especially helpful if you're sanding items with curves or detailing - the sponge conforms to the surface.
 |
| Fine Sanding Sponge |
To get started, I sanded the pine round with the sanding sponge to eliminate any splinters or rough areas. The round is pre-sanded so this went quickly. After sanding, wipe with a slightly damp paper towel. You could also purchase tack cloths designed for this purpose but paper towels work just as well.
Using the foam brush, apply a coat of light colored chalk paint to the top and sides of the pine round. Let dry.
Sand any remaining rough areas after the paint has dried. Again, follow sanding by wiping with a slightly damp paper towel.
Using the bristle brush, dip only the tip of the brush into the dark paint and wipe bristles with a paper towel, leaving very little paint on the brush.
Lightly stroke the brush across the pine round in the direction of the wood grain. Repeat randomly across the entire pine round. Let dry.
And, that's it! This technique is very similar to the one I used on the wooden EAT sign and if you missed that post, you can find it *HERE*.
A few more pics of the completed tabletop:
Have you distressed furniture or décor? Which technique did you use and were you pleased with the results?
Shared with:


You are always so good with your tutorials! I love how you explain everything with pictures. I'm a visual person, so I appreciate that. :) Your table top turned out great! I've distressed a few things, but I just use my "paper towel" technique. Don't laugh, but I just roll up a paper towel and dip it in watered down acrylic paint and kind of drag it over the wood. Lol! Very primitive, but it works. :)
ReplyDeleteI'm totally visual, too, Lisa! I will give your paper towel technique a try in the future on my next paint job! Love the tips and ideas I glean from you all! :)
DeleteThis table is beautiful! I can't wait to try this. Thanks.
ReplyDeleteThank you, Sherry! It really is as easy as it looks - I have no artistic talent whatsoever. Hope you give it a try! :)
DeleteThis looks incredible!!! You are so talented. Thanks for the inspiration!
ReplyDeleteThanks for popping by, Georgia! Appreciate your kind words!
DeleteI absolutely love this! Pinned and tweeted. Thank you so much for bringing such a masterpiece to our party. I hope to see you tomorrow at 7 pm. We can't wait to party with you! Lou Lou Girls
ReplyDeleteAppreciate it, Kimberly! Love your parties!!
DeleteHello Pretty Lady, you are so creative! Thank you for sharing at the Friday Favorites Link Party! Please join us again to share what you have been working on this week. Just a quick question Carolyn...have you done this technique on stained wood? I want to do something with a dark walnut dresser I have and this would be perfect and looks pretty simple. What do you think? Christine @ Must Love Home
ReplyDeleteHi, Christine! You're so sweet! I've not yet tried the paint distressing technique on stained furniture, but I would lightly sand the surface and apply a coat of primer before painting the base coat. My personal favorite primer is Zinsser Bulls Eye 1-2-3. It's water based and for all surfaces. Have used it on all types of painting surfaces and it really does bond the paint to the surface. Looking forward to seeing your project!
Delete