What a Difference a Machine Makes

There's nothing better than a new toy, especially one that's hobby-related!   This little beauty came into my life six months ago and I'm having so much fun!


It's the Husqvarna Viking H Class 100Q.

 (Note:  I was not compensated in any way for this post - 
the opinions expressed are my own and reflect personal experience.)


A little background ...

For years I tolerated a super inexpensive (translation: cheaply made) sewing machine that I am fully convinced did not like me.  From the day we brought it home and took it out of the box, it went on strike.  

Everything was a struggle with it - so much so that once I finally got it threaded and the bobbin loaded, I cringed at the thought of having to change thread colors or having the original thread run out!  We won't even get into the stitch inconsistency issues.

I couldn't avoid feeling like a complete sewing failure because when it comes to sewing, I hail from a long line of seamstresses.  My paternal grandmother made beautiful and detailed clothing - all without store bought or digitally downloaded patterns.  She actually used newspaper pages to cut out her own patterns!

As you can guess, I rarely used my challenging machine.  It was far less stressful to keep it in its box hidden in the closet.  I had exceeded the warranty period years ago and was too disgusted with it to pay for attempted repairs.  To be kind, I won't share with you the "pet" name I had given my first machine!

It was nice to know that my source of frustration was out of sight, but each time I glanced at handmade items - beautiful pillow covers, cute aprons or coordinated dinner napkins and table runners, I felt that longing to try again. 

Then one day while browsing in Joann's Fabrics, while resigned to a future of using my trusty fabric glue, their collection of shiny, sleek machines caught my eye and the rest is history.

I was able to test out the machines and the knowledgeable and helpful staff answered all my questions and helped me narrow down the model that best suited my individual (and super basic) needs.

Once selected, I fully expected to happily walk out of the store with my new purchase and tackle unboxing and setting it up at home.  Was beyond surprised when the salesperson unboxed my machine there on the spot, piece by piece and walked me through assembling the attachments, using the built-in needle threader, and winding and loading the bobbin.  

Once I had it all set up and sewed on test fabric, she had me unthread the machine and repeat the steps to ensure I understood the process (maybe she doesn't do that with everyone - my look of fear probably prompted her to do so!). 

The service provided by the salesperson was excellent!

From day one this machine has functioned problem-free.  No struggles to load the bobbin, no tension issues - a trouble-free and enjoyable experience.  


Husqvarna Viking H Class 100Q Sewing Machine

I won't list all of this machine's features but click HERE to find full details.  If you're looking for a basic machine that offers 20 built-in stitches, I highly recommend it. 


To date, I have made six envelope style pillow covers and am working on a vintage-inspired apron (using a store bought pattern!) - something I wouldn't have attempted with my old machine.  Will share more on them later but here's a glimpse at a couple of the pillow covers.

These were made using a Waverly floral print:


And this lovely neutral striped upholstery fabric was a remnant from Joann's:


I am so grateful that I was able to purchase a new and cooperative machine and continue my sewing journey.

Can you relate to frustrations with certain machines?  Were you able to overcome them or did you discover that finding another machine was the solution for you?  Please share!

Thank you to Kathryn at The Dedicated House for kindly featuring this post!


Your comments are greatly appreciated and I look forward to your thoughts and ideas!  I try to respond to comments via email as soon as I can. If your email address isn't available, I will comment here. Thanks so much for visiting! 


DIY Wood Plank Lighted Headboard

Our recent foyer console table build provided motivation to create a wood plank lighted headboard for our guest room.


Materials used for queen size headboard:

  •  Four 1"x10" boards cut to 5' long
  •  Two 1"x4" boards cut to 37" long
  •  Brad nailer and 2" brads
  •  2" screws to attach support boards to wall studs
  •  Two wall lamps with wall plugs
  •  2-1/2" hole saw
  •  Two 1" wood screws (for mounting lamps to headboard)
  •  Level
  •  Wood stain
  •  Fine sandpaper


Four boards were found in our stash of scrap wood.  They were 1" x 10" and each had a totally different wood tone.  The shortest was actually a 1" piece of plywood (looked like a board to me!).  I was unsure if wood stain would unify these but took a chance that they would blend together once stained. 


LOTS of hand sanding and two coats of Minwax Dark Walnut stain resulted in a beautiful and smooth finish.  And, thankfully the stain looked even and uniform - or as close as possible.


For lighting, we searched Lowe's and Home Depot and looked in all departments - interior, exterior and utility lighting.  While there were lots of awesome options, many were too large.  

We selected two of these from Home Depot in brushed nickel:


http://www.homedepot.com/p/Hampton-Bay-5-1-in-Brushed-Nickel-LED-Spotlight-Desk-Lamp-19274-002/205749849?cm_mmc=shopping-_-bingpa-_-27-_-205749849&ci_src=328768002&ci_sku=205749849&gclid=CIny3MSry8wCFeSAMgodyjgCPg&gclsrc=ds
Hampton Bay Brushed Nickel Lamp


Hubby drilled holes in the top board and dropped each lamp's wall plug through the hole.  These would be hidden behind the headboard.  The lamps were attached to the top board with a 1" wood screw - each lamp had a predrilled hole in the back plate and these slipped easily and snugly onto the mounting screws.


We chose to attach the headboard directly to the wall and first installed two 37" 1x4's vertically, using 2" screws to attach them to wall studs.  


The stained boards were then attached horizontally to the support boards using a brad nailer and 2" brads.  For a more rustic look, you could use wood screws to attach the boards, but I wanted a sleeker look with no exposed screw or nail heads.

Even though the board below looks deceivingly slanted, it's all an illusion - it really is level.  


The finished dimensions are 5' wide x 37" tall.  It was tempting to add even more boards for a much taller headboard, but I wanted space above to hang a piece of metal art.


This was a fun project and I love how a few scrap boards can provide such impact and function in our guest room!   


Your comments are greatly appreciated and I look forward to your thoughts and ideas!  I try to respond to comments via email as soon as I can. If your email address isn't available, I will comment here. Thanks so much for visiting! 


Shared with:

Idea Organizing ... Before Pinterest

Before Pinterest, many of us had been collecting and organizing creative ideas for years ... in binders, photo albums and ... for me, on index cards!


My simple system was devoted mainly to home decor ideas gleaned online and in magazines (remember those?).  

My index cards were equivalent to Pinterest Pins ... it was easy to attach or jot down an idea (photo, sketch) on an index card, and add specific details ... paint color, materials used, etc. 


(If anyone knows the source of any of the decor ideas above, 
please let me know and I will link back.)

The index card topic dividers were the equivalent of Pinterest Boards. 


Pinterest has thankfully made this entire process so much easier, quicker and less cumbersome, but it's still fun to browse through these cards occasionally.  It brings back the excitement and joy of finding a neat new decor idea to try, or seeing an old idea in a totally different way and having it trigger another creative thought.

But who knows, perhaps I'll return to my index card system some day ... surely Pinterest won't be around forever, right?  My cards will!  

And, unlike Pinterest, my cards are stored in a cute little lidded box!  :)


Did you have a paper idea organizing method pre-Pinterest?  Do you still?  


Your comments are greatly appreciated and I look forward to your thoughts and ideas!  I try to respond to comments via email as soon as I can. If your email address isn't available, I will comment here. Thanks so much for visiting! 


  Shared with:
DIY Show Off

Semi-homemade Strawberry Shortcake

If you would like a quick, flavorful dessert packed with fresh homemade taste, this Semi-homemade Strawberry Shortcake is a great choice!


Do you buy frozen strawberries in syrup?  Once you've made your own homemade strawberries in syrup, you will never ever again buy the frozen variety.  And, making it yourself is unbelievably quick and easy with only three ingredients:

  • 1-1/2 cups chopped fresh strawberries
  • 2 tablespoons sugar
  • 1 tablespoon water

Mix all ingredients in a small saucepan and bring to a boil, stirring frequently.  


Reduce heat and simmer until strawberries are tender (about 10 minutes), continuing to stir frequently.  Remove from heat and let cool.


That's it!!!  Can you believe it?  I had never tried making homemade fruit syrups because I was convinced they are time-consuming and complicated.  

This chunky syrup is wonderful served on thick slices of store-bought pound cake or shortcake shells.  


Add a huge dollop or two (or three) of whipped topping and it's amazing!


If you try this, please let me know how you like it.  It's a favorite in our home.  Enjoy!


Your comments are greatly appreciated and I look forward to your thoughts and ideas!  I try to respond to comments via email as soon as I can. If your email address isn't available, I will comment here. Thanks so much for visiting! 


Shared with:


Adding Craft Space Storage

Our combination guest room/craft space is a definite work in progress, but we're truly pleased with the changes we've made to date.

One handy addition is this white shelving unit:


It's the Kallax shelving unit from Ikea and it fits really well into this space.


Kallax from Ikea

It replaces this Leksvik bookcase (also from Ikea but no longer available) that was a little too wide.


Through the years, we've found Ikea pieces to be super sturdy and long lasting.  In fact, the Leksvik bookcase above is many years old and is still in perfect condition. 

Another positive is that Ikea items are easy to assemble - this came in very handy as I tackled this on a day hubby was out of town.

To my benefit, there was a nice booklet with illustrations for each step of the assembly, along with a bag of all hardware, wall anchoring brackets, and even an assembly tool - everything you need in one box.

 
Speaking of boxes, here's where I have to confess that the box was VERY HEAVY - it weighed 67#!  And, as fate would have it, it was still in the back of my SUV and hubby wasn't home when I decided to assemble it.

Being stubborn ... uh, rather ... being determined, I left it in the back of my vehicle, opened the box and brought the contents inside in manageable trips.  :)

That was honestly the most difficult step of the assembly - putting it together was a breeze.


Another impressive feature of the Kallax series is that the base, top and sides of the shelving unit are each approx. 1-1/2" thick.  


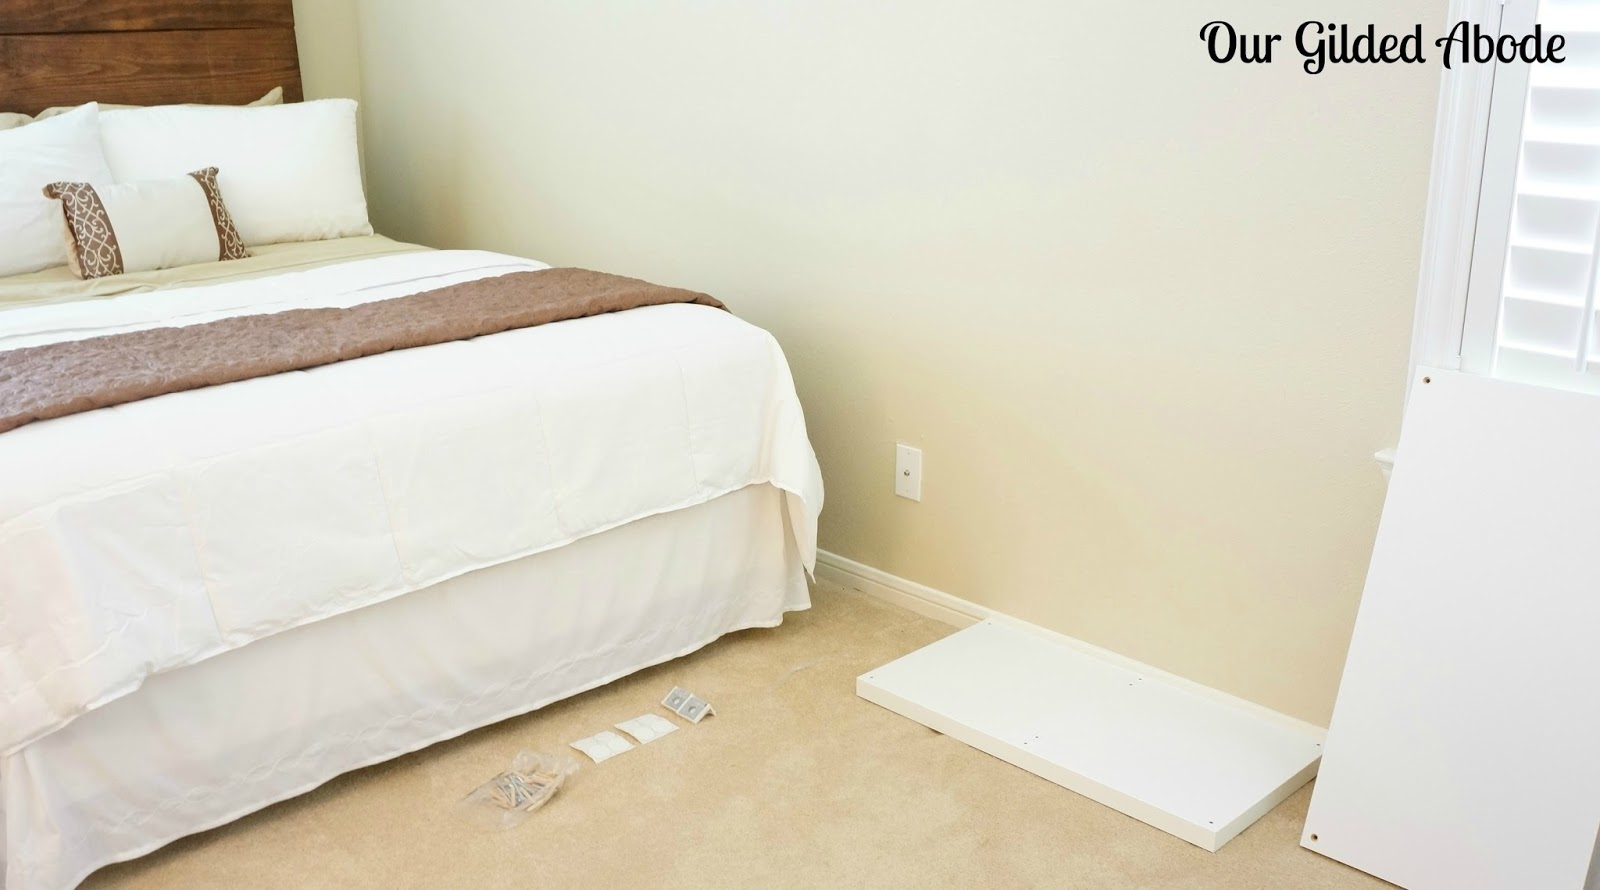
Before investing time in putting it together, I placed the base on the floor to ensure the size worked well and it did.


Above is a sneak peek at another new addition to the room - a DIY wood plank headboard - more on that soon!

A handy tip for using a rubber mallet is to cover the mallet head with a soft cloth (or in this case, an old sock!) to prevent damage or black marks on furniture pieces.  And you guessed  it - I learned this the hard way ... fortunately, marks were easily removed.


Following the instruction booklet, the shelving unit went together easily in about an hour.  


We really do like the crisp clean lines and it provides great options for craft storage and organizing.

Standard fabric storage cubes fit perfectly and are available at most home decor stores.  Or, Ikea offers drawer inserts and door options as well.  


Do you have any Ikea pieces in your home?  Are you as pleased with them as we are?  Have you been brave enough to attempt assembling any yourself?  :)


Your comments are greatly appreciated and I look forward to your thoughts and ideas!  I try to respond to comments via email as soon as I can. If your email address isn't available, I will comment here. Thanks so much for visiting!  


Shared with: